 Skip to content

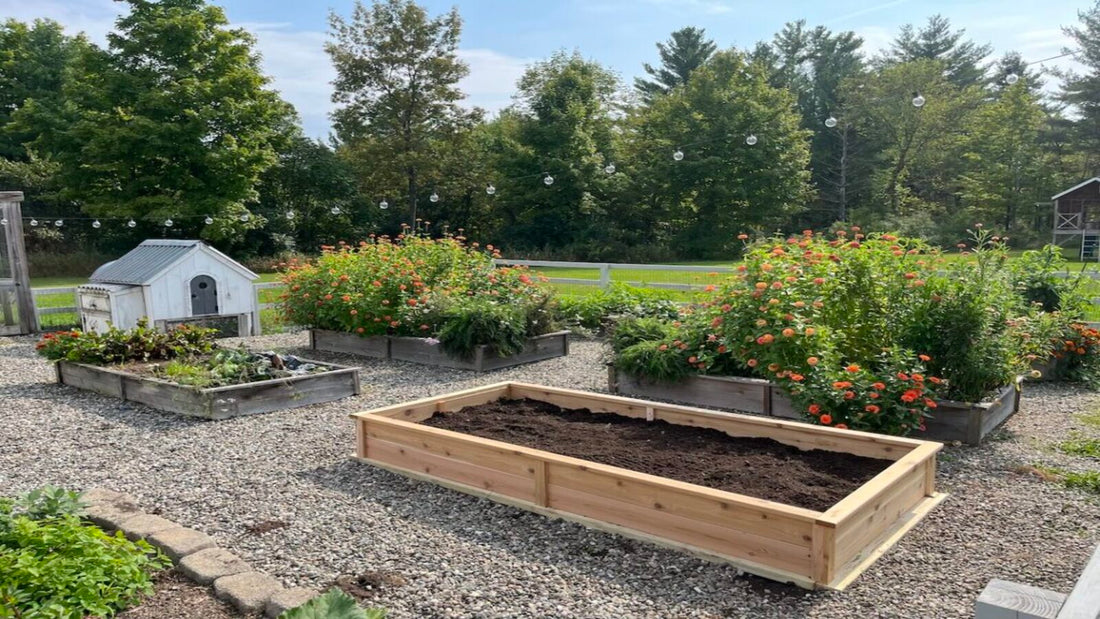
Over the years, I've spent countless hours in my garden, learning what works best through trial and error. It's from these experiences, from the simple joy of planting seeds to the satisfaction of a harvest, that I've gathered a wealth of gardening knowledge. Now, I want to share with you a straightforward way to build your own raised garden bed. This guide cuts through the complexity, offering you clear, easy-to-follow steps to construct raised garden beds:
1. Materials and Dimensions
Choosing 4 feet by 8 feet for my garden bed wasn't a hasty decision. This size struck the perfect balance, allowing me to easily reach the center from any side without stepping into the bed, thus protecting the soil structure from being compacted. My concern for the environment and the health of my plants led me to opt for non-pressure-treated wood. I selected 3 pieces of 2x10s, each 8 feet long, for the sides to give the roots ample depth, and 3 pieces of 2x4s, also 8 feet long, for additional support. This was to ensure the bed could bear the weight of the soil while staying robust over time, without the risk of chemical leach from treated wood.
2. Wood Preparation
The next step was preparing the wood, ensuring each piece was cut to the right length. I aimed for uniformity, so the 2x10s needed to match the 2x4s in length perfectly. Not having the right tools at home, I took advantage of the cutting services at my local Home Depot. This not only saved me time but also ensured the cuts were precise, setting a solid foundation for the assembly phase. It was a reminder of how leveraging available resources could simplify the process significantly.
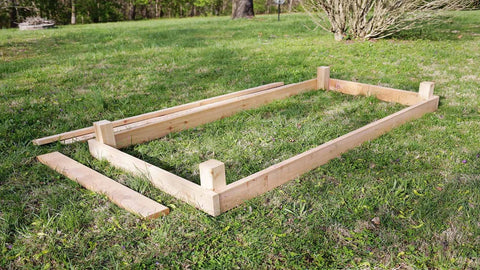
3. Assembly
Starting the assembly was a moment I approached with both anticipation and a bit of anxiety. I laid out the cut pieces on a flat surface, matching the dimensions I had planned. This visual arrangement was crucial. It allowed me to spot any inconsistencies in the wood pieces and get a clear picture of how they would come together. Ensuring each piece was perfectly aligned and positioned was key to a smooth assembly process. This step, though seemingly simple, underscored the importance of precision and attention to detail in building a sturdy and functional raised garden bed.
4. Screw and Secure the Frame
Assembling the frame required careful consideration of the materials to ensure the bed would withstand outdoor conditions. I chose three-inch deck screws, known for their rust resistance and suitability for outdoor use. Before driving the screws into the wood, I pre-drilled holes to prevent the wood from splitting, a common issue that could compromise the frame's strength. Additionally, I used a countersink bit to ensure each screw sat flush with the wood's surface, creating a clean, professional finish. This step was methodical, requiring patience and attention to detail, but it was essential for building a strong and visually appealing garden bed.
5. Ensure Structural Integrity
The strength and security of the frame were my top priorities. To achieve this, I strategically placed four screws in each corner, creating a robust connection between the boards. This method not only secured the frame but also evenly distributed the stress, reducing the risk of the wood warping over time. I then attached side rails, made from the 2x4s, on top of the frame. These served a dual purpose: providing additional structural support and creating a convenient ledge. This ledge would later be beneficial for resting tools or sitting while tending to the plants. This step was a blend of engineering and foresight, ensuring the garden bed would remain sturdy and functional for years.
6. Prepare the Site
Before the final placement of the raised bed, I dedicated time to preparing the site. This meant clearing the area of debris, rocks, and weeds to ensure a smooth, level surface. Anticipating future challenges with weeds, I laid down cardboard and contractors paper as a barrier beneath the bed. This eco-friendly solution was aimed at suppressing any weed growth without resorting to chemical treatments, ensuring my garden remained organic. The preparation of the site was a testament to the adage "measure twice, cut once," emphasizing the importance of foresight in gardening. Ensuring the site was ready and protected would save me countless hours of maintenance in the future.
7. Final Assembly Adjustments
To reinforce the bed's structure, I installed cleats-small blocks of wood-inside the frame. These cleats provided critical internal support and served as anchor points for the side rails, further enhancing the bed's integrity. This step was about more than just adding support; it was about ensuring every part of the bed was in harmony. I meticulously checked that all pieces were flush and level, adjusting as necessary. This precision was crucial for preventing any uneven pressure that could compromise the bed over time, ensuring a stable and enduring structure.
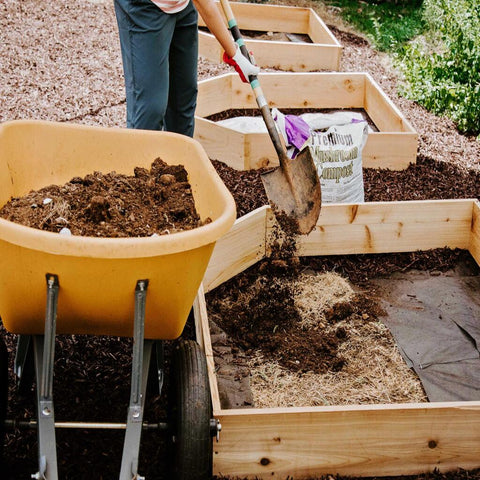
8. Soil Preparation and Filling
Preparing the soil was an opportunity to create the perfect growing environment for my plants. I began with a layer of peat moss, chosen for its ability to retain moisture, an essential component for healthy plant growth. Next came a generous addition of black leaf mulch, rich in nutrients, to enrich the soil. The final touch was my homemade compost, a culmination of kitchen scraps and yard waste transformed into a potent source of fertility for the bed. Layer by layer, I filled the bed, thoroughly mixing the components to ensure a uniform and fertile growing medium. This process was not just about filling space; it was about crafting a foundation teeming with life and potential.
9. Final Touches and Considerations
Ensuring the raised bed was level was the final critical step before planting. I adjusted the soil beneath the bed rather than altering its structure, maintaining the integrity of what I had built. It was also crucial not to elevate the bed too high off the ground to prevent the structure from deteriorating quickly under the weight of the soil and moisture. This balance was key to creating a stable environment that could support the vibrant ecosystem I envisioned.
Where to Buy Raised Garden Bed Materials
For beginners in gardening or those looking to simplify their gardening endeavors, constructing a wooden raised garden bed from scratch may appear overwhelming due to the complexities and manual labor involved. If you feel this way, go for a metal raised garden bed, a straightforward and efficient alternative.
ANLEOLIFE offers a wide variety of metal raised garden beds that are ideal for anyone looking to easily start their gardening journey. Our products come in numerous sizes, colors, shapes, and specifications, ensuring there's something to meet every gardener's needs.
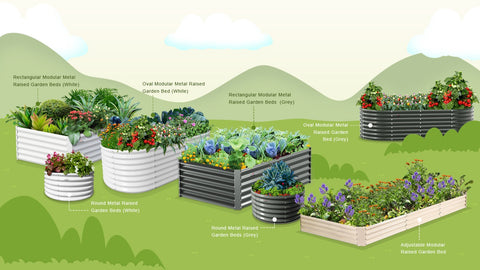
These garden beds are made from galvanized stainless steel, offering durability, eco-friendliness, and ease of assembly. They are designed to last over 20 years and feature advantages such as corrosion resistance, high temperature and heat dissipation, and ergonomic designs that reduce the need for bending. Additionally, ANLEOLIFE's focus on sustainability is evident in our efforts to develop environmentally friendly solutions, including solar-powered watering systems and biodegradable packaging, making our garden beds an excellent choice for eco-conscious gardeners.
Final Words
Building a raised garden bed is a rewarding project that enhances the gardening experience by offering control over soil conditions, reducing pest issues, and making garden maintenance easier. By following this guide, gardeners of all levels can successfully construct a raised bed, paving the way for a fruitful and enjoyable gardening season.
Read More
- Anleolife Garden View: Do Metal Raised Garden Beds Get Too Hot To Hold
- Anleolife Garden View: What Is The Right Size of Your Metal Raised Gar
- Can You Imagine Trees in Metal Raised Garden Beds? – Anleolife Garden
- A Concise Filling Approach as Reference – Anleolife Garden
- Tips from Anleolife Garden Bed: 11 Best Gardening Tools Ignored by Mos